Have your trusty plastic kayak lost its luster, marred by the scars of time and use? Are you looking to give your plastic kayak vibrant paint? But don’t know, unleash your creativity on those plain surfaces? But worry not, for an exhilarating solution awaits!
The faded colors and worn-out exterior can dampen the thrill of your kayaking escapades. And painting a kayak isn’t just about aesthetics; it’s an exciting journey of self-expression and creativity. Not only does it allow you to express your personal style, but it also adds a layer of protection against the elements.
In this guide, we’ll unveil the art of transforming your plastic kayak into a dazzling masterpiece that truly reflects your adventurous spirit. From choosing the perfect colors to adding imaginative designs, each step is an opportunity to infuse your passion and flair into your kayak.
Contents
Understanding Different Types Of Paints To Use
Choosing the right type of paint is crucial for achieving a professional and long-lasting finish. By the end, you’ll be equipped with the knowledge to make an informed decision for your project.
Spray Paint
Spray paint is a popular choice for painting plastic kayaks due to its ease of use and ability to provide an even coat. It comes in various colors and finishes, allowing you to achieve the desired aesthetic. However, there are some important considerations when using spray paint:
- Base Coat: Before applying spray paint, it is recommended to apply a primer or base coat specifically designed for plastic surfaces. This helps improve adhesion and ensures that the paint adheres evenly.
- Coats: To achieve optimal coverage and durability, multiple thin coats are better than one thick coat. Allow each coat to dry before applying the next.
- Exterior Applications: If you plan on using your kayak primarily in outdoor environments, choose a spray paint that is formulated for exterior applications. These paints offer enhanced resistance against UV rays and weathering.
Oil-Based Paint
Oil-based paints are another option for painting plastic kayaks. They provide excellent durability and can withstand harsh conditions without chipping or peeling easily. Consider these points when using oil-based paint:
- Quality Paint: Opt for high-quality oil-based paints specifically formulated for plastics. These paints adhere well to plastic surfaces and offer superior protection against water damage.
- Finishing Paint: After applying the base color with oil-based paint, consider adding a finishing layer with polyurethane paint. Polyurethane provides additional protection against scratches, abrasions, and fading caused by sun exposure.
- Sheen: Oil-based paints come in different sheens, including glossy, semi-gloss, and matte. Choose the sheen that suits your preferences and desired aesthetic.
Specialized Paints For Plastic Surfaces
In addition, to spray paint and oil-based paint, specialized paints are available specifically designed for plastic surfaces. These paints offer unique advantages:
Good Adhesion:
These paints are designed to stick well to the kayak’s surface, so you won’t have to worry about the paint flaking or peeling off easily.
Flexibility:
Since plastic kayaks can bend and flex when you use them on the water, using a specialized paint for plastics ensures that the paint can move with the kayak without cracking or chipping.
Lots of Colors to Choose From:
You’ll find these specialized paints in a wide range of colors, giving you plenty of options to pick from and personalize your kayak with your favorite shades.
Step-by-Step Guide: Painting A Plastic Kayak
Before diving into the step-by-step process of painting your plastic kayak, let’s ensure we have all the necessary supplies ready. Gathering these items beforehand will ensure a smooth and successful painting experience.
Here’s a list of what you’ll need:
- Oil-based Paint or Spray: When choosing paint for your kayak, you can go for either plastic oil-based paint or spray. Make sure it’s designed for outdoor use and works well on plastic surfaces. These options are made to last and resist damage from sunlight, so your kayak will keep its bright colors even after exposure to the sun.
- Suitable Primer for Plastic Surfaces: If you’re using certain types of paint, you might need a plastic primer. This primer helps the paint stick well to the kayak’s surface and creates a strong base for the final coat of paint. It ensures that the paint job stays smooth and long-lasting.
- Sandpaper or Abrasive Pad: To prepare the kayak’s surface for painting, you’ll need fine-grit sandpaper or an abrasive pad. Lightly sanding the surface will create a slightly rough texture, helping the paint bond more effectively to the plastic.
- Masking Tape: A type of tape that you can use to cover and protect certain areas of the kayak from getting painted. It’s useful when you want to create different designs or keep some parts of the kayak without paint.
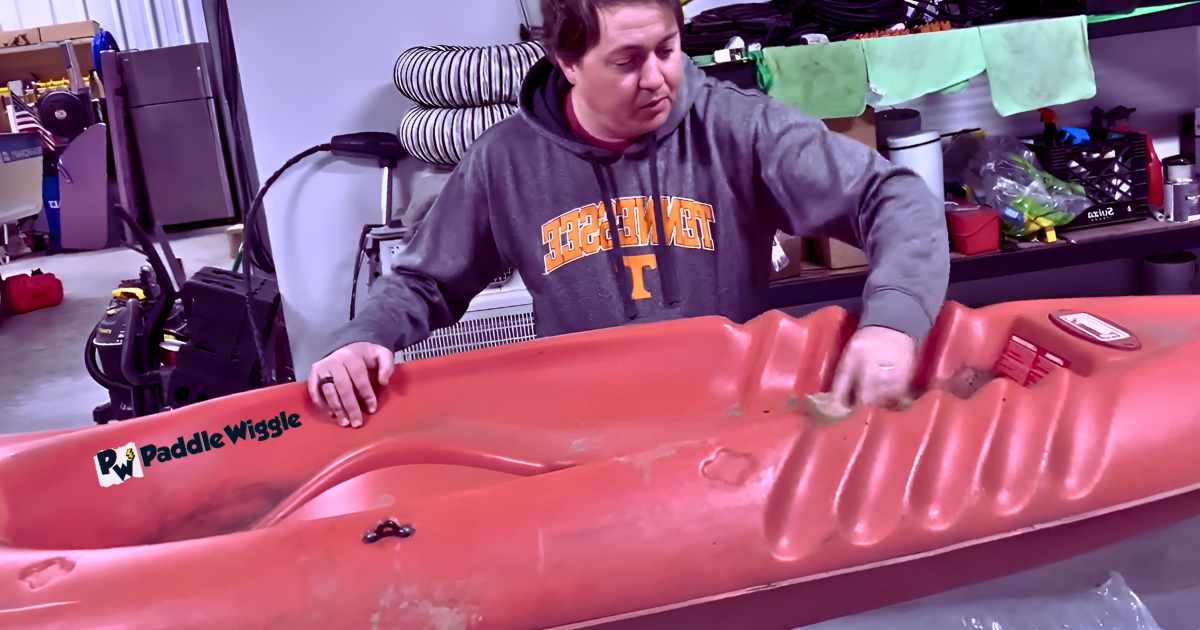
#1. Cleaning Your Kayak
Before you begin the painting process, it’s crucial to ensure your kayak is clean and free of dirt or debris. Start by rinsing the kayak with water to remove any loose particles. Then, use a mild detergent or soap mixed with water to scrub away any stubborn stains or grime. Rinse thoroughly and allow the kayak to dry completely before moving on to the next step.
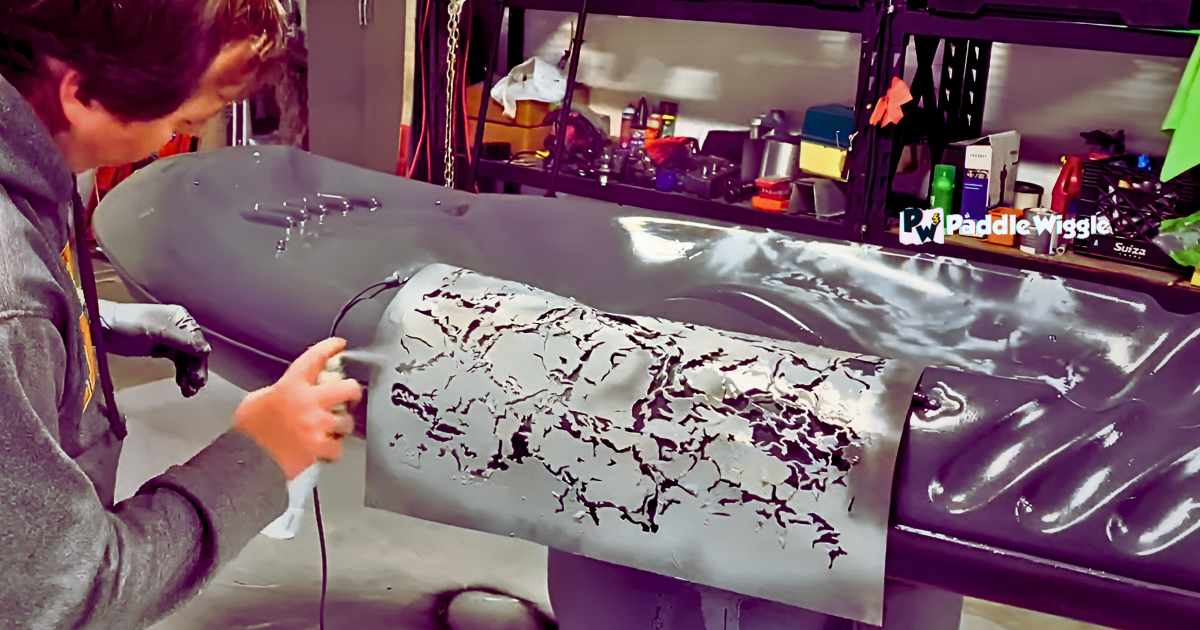
#2. Sanding The Surface
Sanding is essential to create a smooth surface for the paint to adhere to. Use fine-grit sandpaper (around 220 grit) and lightly sand the entire surface of the kayak. This will help remove any imperfections and provide better adhesion for the paint. Be sure to wipe away any dust or residue with a clean cloth before proceeding.
#3. Applying Primer
Priming your plastic kayak is crucial for ensuring that the paint adheres properly and lasts longer. Choose a primer specifically designed for use on plastics. Apply an even coat of primer using a brush or roller, following the manufacturer’s instructions regarding drying time between coats if necessary. Allow the primer to dry completely before moving on to the next step.
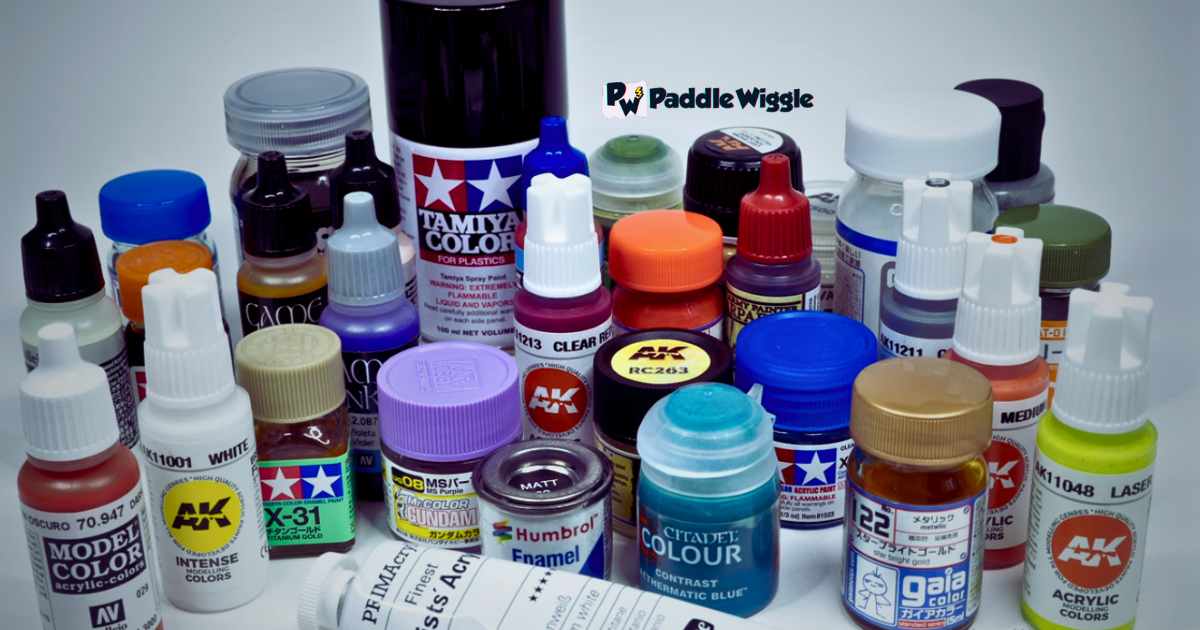
#4. Choosing Your Paint
Selecting high-quality marine-grade paint is important. Look for paints that are specifically formulated for use on plastics and can withstand exposure to sunlight, water, and other elements commonly encountered while kayaking.
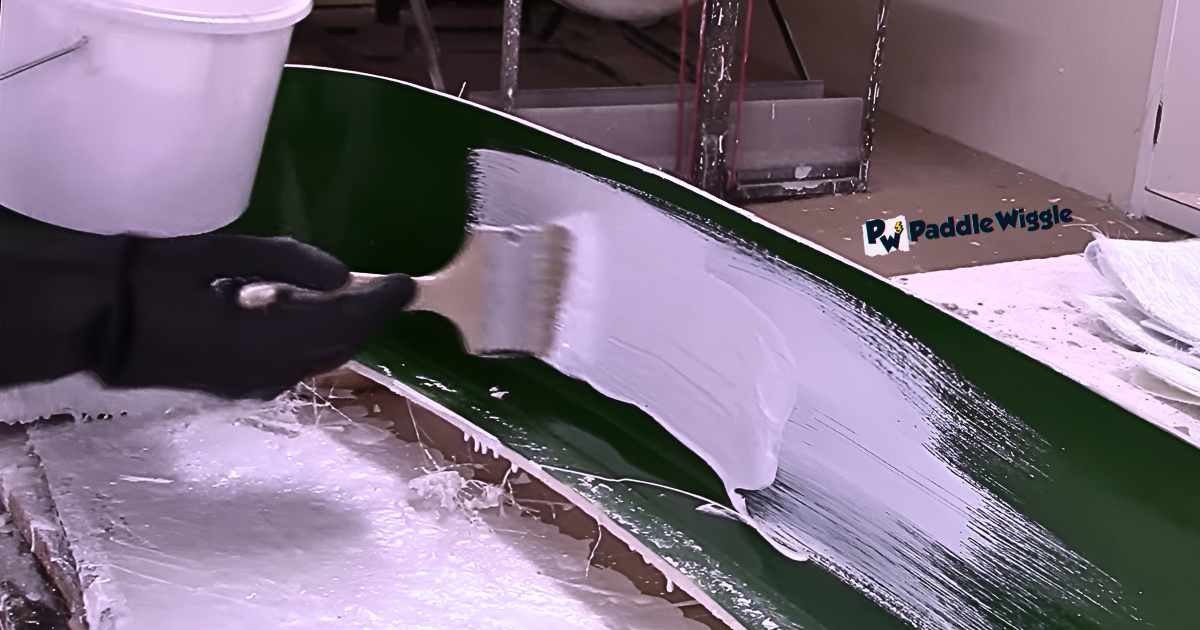
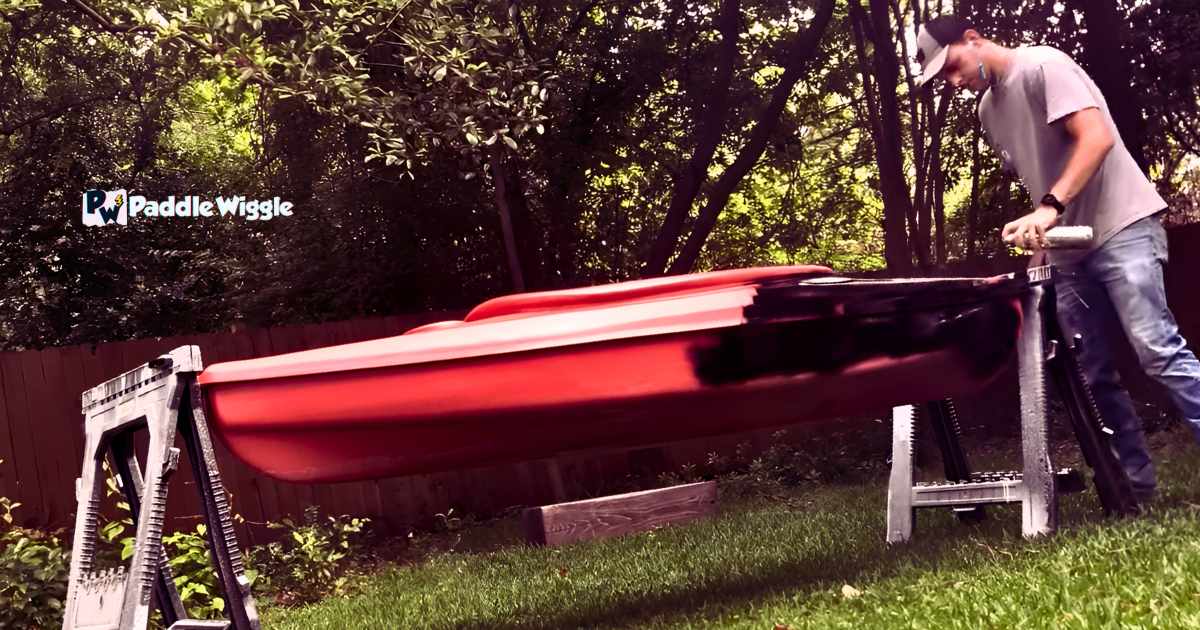
#5. Applying Paint
Once your primer is dry, it’s time to apply the paint. Use a brush or roller to ensure even coverage. Start with thin coats and allow each coat to dry before applying the next one. This will prevent drips and ensure a smooth finish. Depending on the desired color and opacity, you may need multiple coats of paint.
#6. Finishing Touches
After applying the final coat of paint, allow it to dry completely according to the manufacturer’s instructions. Once dry, inspect your kayak for any touch-ups that may be needed. Use a fine brush or sponge applicator to fix any imperfections.
#7. Add Personal Touches (Optional)
Now that the main paint is dry, it’s time to get creative and add your touch to the kayak. This step lets you make the kayak truly your own by adding unique designs and colors.
Custom Designs: You can draw and paint your designs on the kayak. Think about what you love or what inspires you, and let your imagination guide you.
Stencils and Decals: If drawing is not your thing, don’t worry! You can use ready-made stencils or stickers to create cool patterns and images on your kayak.
Color Combinations: Experiment with different colors to make your designs stand out. Bold color combinations can make your kayak look even more eye-catching.
Inspirational Quotes: You can add your favorite quotes or sayings to give your kayak a personal touch and some extra motivation for your adventures.
Nature-Inspired Themes: Drawing nature-inspired things like waves, birds, or flowers can bring peace and beauty to your kayak.
Now, you can confidently hit the water, knowing that your kayak not only performs well but also looks fantastic.
Oil-Based And Spray Paint
You have two main options when painting a kayak: oil-based paints or spray paints.
Oil-based paints offer better coverage and durability, making them suitable for larger areas. Spray paints, on the other hand, are convenient for intricate designs and small areas.
Each option has its own set of pros and cons that you should consider before making a choice.
Oil-Based Paints
Oil-based paints are tough and stick well to different surfaces, including plastic. They create a smooth, strong finish that can handle water and tough weather. They work great for larger areas because they cover well.
But, using oil-based paints takes more time and effort. You have to apply them with a brush or roller, which can be slow when painting a big area like a kayak.
Plus, cleaning the brushes afterward can be tricky because you need special solvents like mineral spirits.
Pros and Cons Of Oil-Based Paints For Kayaks
- Pros: Durability, good adhesion, smooth finish
- Cons: Time-consuming application, challenging brush cleaning
Spray Paints
Spray paints are a favorite among DIY enthusiasts because they are easy to use and convenient. They come in cans with nozzles, which help you apply an even paint coat without a brush. Spray painting works well for detailed designs and tricky areas of your kayak that are hard to reach with a brush.
One advantage of using spray paint is its quick drying time. This allows you to apply multiple coats within a shorter period compared to oil-based paints. Spray painting reduces the risk of visible brush strokes on your kayak’s surface.
However, there are some considerations when using spray paint. Firstly, working outdoors or in a well-ventilated area is crucial to avoid inhaling airborne particles. Secondly, overspray can be an issue if not controlled properly.
Using a paint sprayer booth or creating a suitable painting area with proper masking and covering is recommended for kayaks.
Pros and Cons Of Spray Paints For Kayaks
- Pros: Convenience, even coat application, quick drying time
- Cons: Potential overspray issues, need for proper ventilation and painting area setup
Oil-Based vs Spray: Which Paint Is Best For Kayaks
When choosing between oil-based paints and spray paints for your kayak, think about what’s most important to you.
Oil-based paints stick well and last a long time, which is great for protecting your kayak. They also cover larger areas better. However, using them takes more time and effort to apply and clean up.
On the other hand, spray paints are easy to use and work well for detailed designs and tricky spots on your kayak. They dry quickly, so you don’t have to wait long between coats. But you should be careful about overspray, and working in a place with good air circulation is essential.
Let’s compare which one is best for painting a kayak:
| Comparison | Oil-Based Paints | Spray Paints |
|---|---|---|
| Durability | Highly durable and can withstand weather exposure | Durable and suitable for outdoor use |
| Adhesion to Plastic | Excellent adhesion to plastic surfaces | Also adheres well to plastic surfaces |
| Coverage | Offers better coverage for larger areas | Convenient for intricate designs and small areas |
| Application Method | Requires brush or roller application | Easy application with aerosol spray cans |
| Drying Time | Longer drying time compared to spray paint | Quick drying, allows for multiple coats faster |
| Brush Marks | May leave visible brush strokes | Provides an even coat without brush marks |
| Cleaning | Cleaning brushes requires solvents | No need for brush cleaning, easy disposal |
| Ventilation | Requires good ventilation | Requires ventilation to avoid inhaling paint fumes |
| Overspray | N/A | Careful control needed to avoid overspray |
So, if you have experience with brushwork and want more control over the painting process, using a paintbrush may be the better option. And if you prefer a quicker application method with less visible brush strokes, spray painting could be your go-to choice.
5 Kayak Painting Mistakes That Will Ruin Your Effort
Painting a plastic kayak can be a fun and exciting project, but you need to be careful to avoid some mistakes that might make the result less good. Whether you want to make the kayak look special with your designs or protect it from damage, knowing the right way is important.
That’s how you can make sure it turns out just the way you want and enjoy the process too.
So, we’ve compiled a list of 5 common mistakes to avoid when painting a plastic kayak:
Improper Cleaning: The First Step Towards Success
One of people’s biggest mistakes when painting their plastic kayaks is not cleaning them properly beforehand. Skipping this step can result in poor adhesion and paint peeling off easily.
To avoid this, start by thoroughly cleaning your kayak using mild soap and water. Remove any dirt, grime, or residue that may be present on the surface. It’s also essential to ensure that the kayak is completely dry before moving on to the next step.
Inadequate Surface Preparation: Setting Yourself Up For Failure
Another critical mistake many individuals make is neglecting proper surface preparation. Before applying any paint, it’s essential to roughen up the surface of the plastic kayak using sandpaper or a sanding block. This helps create a better bond between the paint and the plastic surface, ensuring long-lasting results.
Make sure to remove any dust or debris created during sanding before proceeding with painting.
Choosing The Wrong Paint: A Recipe For Disaster
Using the wrong type of paint can spell disaster for your plastic kayak painting project. Selecting a high-quality marine-grade paint specifically designed for use on plastics is crucial. These paints are formulated with additives that promote adhesion and flexibility, making them ideal for kayaks exposed to water and UV rays.
Rushing Through Coating Application: Patience Pays Off
Applying multiple thin coats of paint is key. Many people make the mistake of applying thick coats, leading to uneven coverage and longer drying times. Instead, take your time and apply thin coats, allowing each layer to dry completely before adding another. This approach ensures better adhesion and a smoother, more durable finish.
Lack Of Protective Finish: Guarding Against Damage
Another common mistake when painting a kayak is not adding a protective finish. After the paint dries completely, apply a clear coat or marine-grade varnish. This will safeguard your kayak from scratches, UV rays, and water. It’s like adding an extra shield to make the paint last longer and keep your kayak looking great for many years.
Learn To Paint Your Plastic Kayak Like A PRO
Achieving a professional-looking finish when painting a plastic kayak can be a challenging task. However, you can take your project to the next level with the right techniques and insider knowledge.
Smooth Finishes
Achieving a smooth finish is crucial for an aesthetically pleasing result. Here are some tips to help you accomplish this:
- Preparation: Before applying any paint, ensure that the kayak’s surface is clean and free from dirt, grease, or debris. Use soap and water to wash the kayak thoroughly and allow it to dry completely.
- Sanding: Lightly sanding the kayak’s surface can promote better paint adhesion. Use fine-grit sandpaper (around 220 grit) in circular motions to create a slightly rough texture.
- Primer: Applying a primer specifically designed for plastic surfaces can improve paint adhesion and provide an even base coat. Choose a primer compatible with your selected paint type.
Avoiding Drips Or Streaks
Drips or streaks can mar the appearance of your painted kayak. To prevent them from occurring:
- Thin Coats: Apply thin coats of paint instead of thick layers to minimize the risk of drips or streaks forming.
- Proper Technique: Use long, smooth strokes while applying paint to maintain consistency throughout the surface.
- Allow Drying Time: Follow the manufacturer’s instructions regarding drying time between coats to prevent smudging or uneven application.
Enhancing Durability
To ensure that your painted plastic kayak withstands harsh conditions and maintains its vibrant color over time:
- Marine Grade Paint: Opt for marine grade paint specifically formulated for watercraft. These paints are designed to withstand exposure to water, UV rays, and other environmental factors.
- Plasti Dip: Consider using a rubberized coating like Plasti Dip for added protection. This flexible coating can provide an extra layer of durability against scratches and impact.
- Marine Wax: Applying marine wax after painting can help protect the kayak’s surface from fading, oxidation, and damage caused by saltwater or sunlight.
Learn More
How Long Does The Paint On A Plastic Kayak Last?
Oil-based paints can last anywhere from 5 to 15 years on kayaks. However, how long the paint stays on your plastic kayak depends on a few things, like the type of paint used, how much it’s exposed to sunlight and water, and how much you use it. If you take good care of it and do proper maintenance, you can expect the paint to stay on for many seasons.
Can I Repaint My Plastic Kayak If I’m Not Happy With The Results?
Yes, you can repaint your plastic kayak if you’re not satisfied with the initial results. Make sure to follow proper cleaning and sanding techniques before applying a new coat of paint.
Is It Necessary To Apply A Clear Coat After Painting My Plastic Kayak?
Applying a clear coat can provide extra protection for your painted kayak. It helps guard against scratches, UV damage and extends the life of your paint job. Consider using a marine-grade clear coat for optimal durability.
Can I Use Vinyl Wraps Instead Of Painting My Plastic Kayak?
Yes, vinyl wraps are an alternative option to painting your plastic kayak. They offer customization possibilities without permanent changes to your kayak’s surface. However, ensure that the wrap is specifically designed for outdoor use and can withstand water exposure.
Final Words
In a nutshell, painting a kayak might feel a little challenging if you’re new to it. But don’t worry, take your time and follow each step carefully. First, clean the kayak really well to make the surface smooth for painting. Then, gently sand it to help the paint stick better. When you’re painting, use thin coats and let each coat dry before adding more. And don’t forget to be patient and let the paint fully dry before using your newly painted kayak.
Remember, painting your kayak is not just about making it look nice; it’s a way to express yourself and have fun. Those moments when you added your personal touches were a way of showing your adventurous spirit and love for nature. So, hold on to those memories and enjoy your kayak’s new look on all your exciting adventures in the future. Have a great time paddling with your beautifully painted kayak!

The thing I may add on to this it takes a cost of $140 and estimated 4 and a half hours