Picture this: you’re on the open road with your RV all set for an adventure, and your kayaks are just waiting to be dipped into the waters. However, there’s a small problem – how can you bring your kayaks along without the hassle of using a trailer? This is where constructing a kayak rack for your RV becomes useful.
Now, why bother with making your own rack when trailers are an option?
While it’s true that trailers offer a solution, they come with their own set of limitations. The additional weight and potential challenges posed by various terrains can put a damper on your travels.
It’s all about adding excitement to your trips, mixing kayaking with camping. It’s a chance to make cool memories and show your love for the outdoors.
Here’s the deal: A DIY kayak rack can make your journey smoother and more enjoyable. It’s like giving your kayaks a cosy spot on your RV, ready to hit the water whenever you are.
As you go on expeditions, this adds fun – combining kayaking and camping. It’s a way to make fun memories and show how much you like being outside.
No more struggling with kayak trailers or awkwardly fitting them inside your RV!
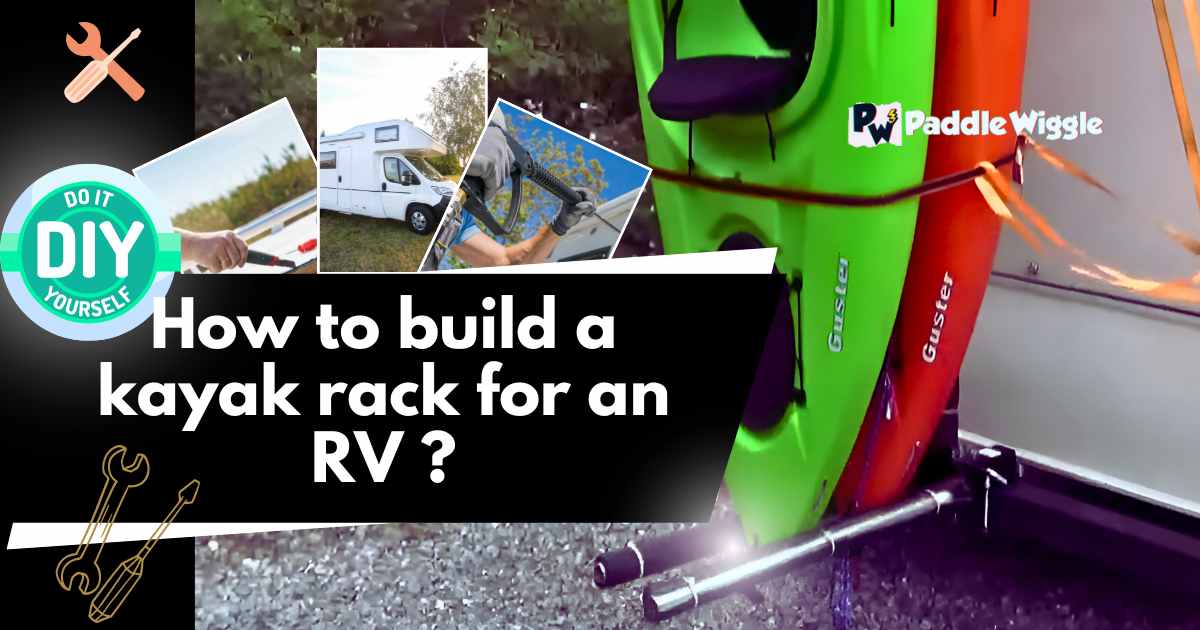
In this guide, we’ll explore how to build a kayak rack for an RV (7 easy steps). From saving money to adding a personal touch, you’ll learn how to build a perfect one from scratch.
Now let’s jump right in!
Contents
7 Steps To Build A Kayak Rack For An RV
Creating your own kayak rack for your RV can make your outdoor adventures even better. It’s like turning your RV into a magic vessel that carries your dreams and your gear to incredible destinations.
Your RV becomes more than just a way to get around – it becomes a key to amazing experiences. With your kayaks safely on the rack, you’re ready to go to places you’ve always wanted to see.
Let’s dive into the steps.
Step 1: Determine The Design
Deciding on the type of kayak rack you want to build for your RV is an important first step. There are various options available, each with its own advantages and considerations. You can choose the design that best suits your needs by considering the available space, your specific RV model, and your preferences.
Consider The Available Space
Before diving into building a kayak rack for your RV, it’s crucial to assess the available space. Take a look at your RV’s exterior and determine where a kayak rack could fit without obstructing other components or impeding functionality. Keep in mind that different designs may require varying amounts of space.
Evaluate Your Specific Rv Model
Every RV model has its unique characteristics and specifications that can influence the type of kayak rack you should build. Consider factors such as roof structure, rear bumper configuration, ladder design, and any existing attachments or accessories on your RV. Understanding these details will help you select a compatible kayak rack design.
Explore Different Options
Now that you have assessed the available space and evaluated your specific RV model, it’s time to explore different types of kayak racks. Here are some popular options:
- Rooftop Rack: This design involves mounting the kayak on top of your RV’s roof using specialized crossbars or brackets. It allows easy access to kayaks but may increase overall height.
- Rear-Mounted Rack: As the name suggests, this rack attaches to the back of your RV and provides convenient loading/unloading from ground level. However, it may limit access to rear storage compartments.
- Ladder-Mounted Rack: If your RV has a ladder attached to its exterior, consider utilizing it for mounting a kayak rack. This option is suitable for lightweight kayaks but may not be ideal for larger ones due to stability concerns.
Consider Personal Preferences
Your personal preferences play an essential role in determining which design is the best fit for you. Think about factors like ease of installation, convenience in loading/unloading kayaks, and overall aesthetics. Remember, you want a kayak rack that serves its purpose and enhances your RV’s functionality and appearance.
Once you have made this decision, you can move on to the next step of gathering materials and starting the construction process.
Step 2: Gather Materials
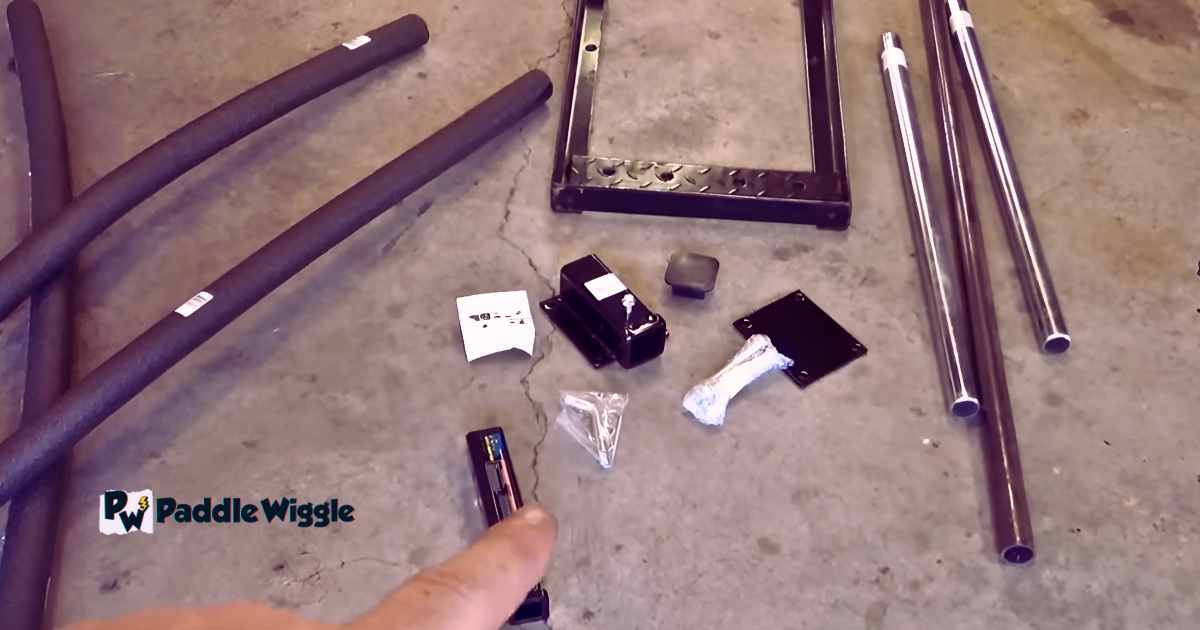
To begin building your own kayak rack for an RV, you’ll need to gather the necessary materials. These items will ensure you have everything required to construct a sturdy and reliable rack to hold your kayaks during travel.
PVC Pipes Or Metal Tubing
The first item on your list is either PVC pipes or metal tubing, depending on your preference and budget. PVC pipes are lightweight, affordable, and easy to work with, making them a popular choice for DIY projects. On the other hand, metal tubing provides added strength and durability if you plan on carrying heavier kayaks.
When selecting PVC pipes or metal tubing, consider their dimensions based on the size of your kayaks. Opt for thicker pipes or tubes if you have larger kayaks or plan to transport multiple kayaks simultaneously.
Connectors Or Joints
Next, you’ll need connectors or joints to assemble the frame of your kayak rack. These components allow you to connect the PVC pipes or metal tubing securely. There are various types of connectors available in both plastic and metal options.
Some common connector options include:
- T-connectors: Ideal for creating perpendicular connections between two pipes.
- Elbow connectors: Useful for creating angled joints.
- Cross connectors: Perfect for joining four pipes together at right angles.
Choose connectors that suit your design requirements and ensure they are compatible with the chosen material (PVC or metal).
Screws Or Bolts
Screws or bolts play a crucial role in providing additional stability to your kayak rack. They help secure the connectors tightly onto the frame, preventing any wobbling during transportation.
When selecting screws or bolts, opt for ones made from corrosion-resistant materials like stainless steel. This ensures longevity even when exposed to outdoor elements such as rain and humidity.
Bungee Cords Or Straps
You’ll need bungee cords or straps to keep your kayaks securely in place while on the road. These accessories provide the necessary tension to hold your kayaks in position, preventing them from shifting or falling off the rack.
Consider using adjustable straps with buckles or ratchet mechanisms for added convenience and ease of use. Ensure that the bungee cords or straps are strong enough to withstand the weight of your kayaks and can be easily tightened and released as needed.
Additional Accessories
Depending on your chosen design and personal preferences, you may require additional accessories to enhance the functionality of your kayak rack. Some optional items include:
- Foam padding: Provides extra protection for your kayaks by cushioning them against potential scratches or dents.
- Tie-down anchors: Offers additional attachment points for securing your rack to the RV more securely.
- Locks: Prevents theft by adding a layer of security to your kayak rack.
Step 3: Measure And Plan
To build a kayak rack for your RV, it is crucial to start with accurate measurements and a well-thought-out plan. This step will ensure that the dimensions of the rack are suitable for both your kayaks and your RV. Let’s dive into the details:
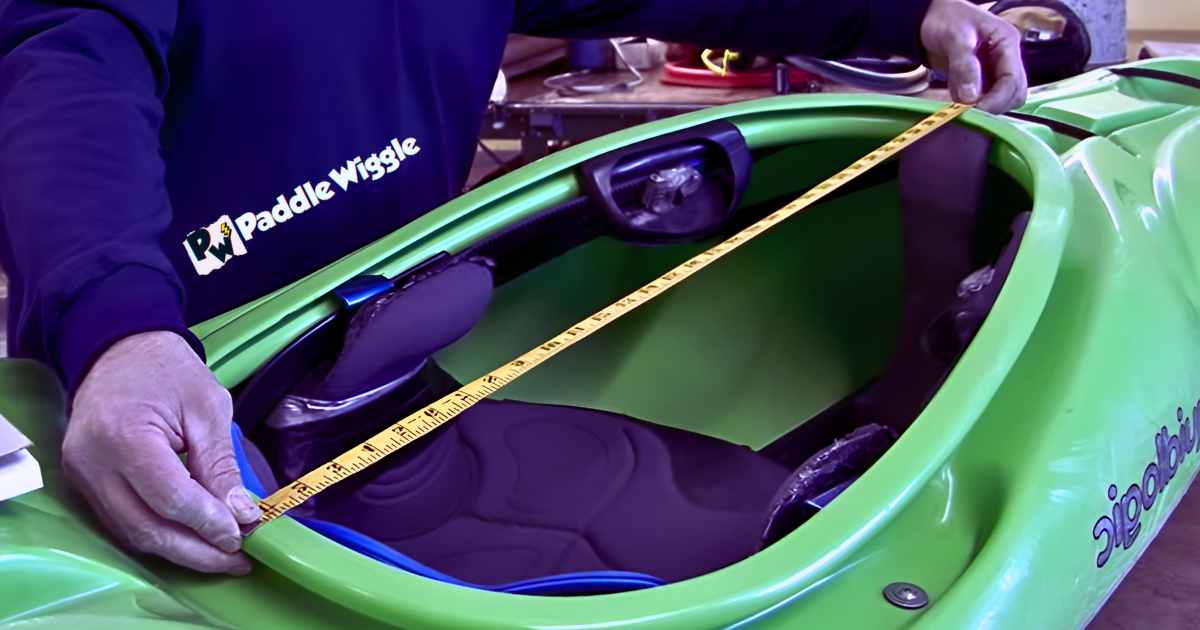
Measure The Dimensions
Begin by measuring the length, width, and height of your kayaks. These measurements will determine how much space you need to allocate for each kayak on the rack. Measure the distance between the roof or rear of your RV where you intend to install the rack.
Plan Accordingly
Once you have gathered all the necessary measurements, it’s time to create a detailed plan. Consider factors such as how many kayaks you want to transport and whether you prefer a rooftop or rear-mounted rack. Sketch out different design options that align with your preferences.
Cut PVC Pipes Or Metal Tubing

Based on your design plan, cut PVC pipes or metal tubing using a saw or pipe cutter. Ensure that the lengths match the dimensions required for holding your kayaks securely. Maintaining accuracy during this step is essential so that everything fits together seamlessly later.
Ensure Accurate Lengths And Angles
Double-check that each piece has been precisely measured according to your design specifications as you cut the PVC pipes or metal tubing. Pay attention to any angles required in order to accommodate specific features of your RV or the desired positioning of the kayak rack.
Size Matters
The size of both your kayaks and RV plays a significant role in determining how large or small your kayak rack should be. Take into account any additional accessories attached to either entity when calculating space requirements.
By taking careful measurements and creating a solid plan before building your kayak rack, you’ll avoid any potential mishaps down the road. Remember that precision is key when cutting PVC pipes or metal tubing – one wrong measurement can throw off the entire construction. With accurate lengths, angles, and a well-sized rack, you can confidently transport your kayaks on your RV adventures.
Now that we have covered the measurement and planning phase, it’s time to move on to the next step: assembling the rack components. Stay tuned for Step 4!
Step 4: Assemble The Frame
To build a sturdy and reliable kayak rack for your RV, it’s time to assemble the frame using either PVC pipes or metal tubing along with connectors or joints. Depending on your material choice, there are different methods to ensure a secure connection.
Using Pvc Pipes
If you opt for PVC pipes, measure and cut them according to your desired dimensions. Remember that the length of the pipes will determine how many kayaks you can accommodate on the rack. Once you have all the necessary pieces cut, it’s time to connect them.
- Apply PVC cement or adhesive: To create a strong bond between the pipes, apply PVC cement or adhesive to both ends before joining them together. This will ensure a tight and secure connection that can withstand the weight of your kayaks.
- Connect the pipes: Carefully insert one end of a pipe into the connector or joint and push it in until it is fully seated. Repeat this process for all remaining joints until you have assembled the entire frame.
- Allow time for drying: After connecting all the pieces, give ample time for the adhesive to dry completely before moving on to attaching other components. This will prevent any weakening of joints during further assembly.
Using Metal Tubing
If you prefer using metal tubing instead of PVC pipes, follow these steps:
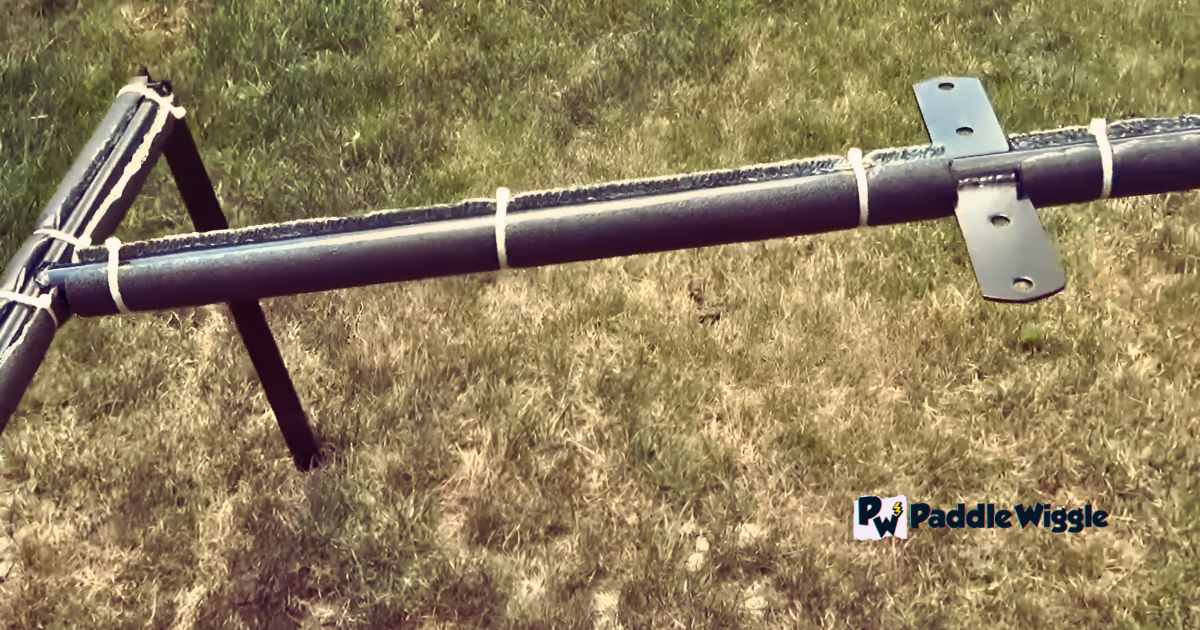
- Measure and cut: Measure out the required steel angle iron or metal tubing lengths based on your design specifications. Use a saw suitable for cutting metal to ensure clean and accurate cuts.
- Drill holes: In order to secure joints between tubes, drill corresponding holes at each connecting point using an appropriate-sized drill bit. Make sure these holes align properly when assembling the frame.
- Attach screws or bolts: Insert screws or bolts through these drilled holes and tighten them securely with nuts on either side of each joint. This method ensures stability and durability by firmly holding the metal tubing together.
Regardless of the material you choose, ensuring that the frame is sturdy and stable is crucial. Once assembled, give it a firm shake to check for any wobbling or weak points. If needed, reinforce any weak areas with additional connectors or joints.
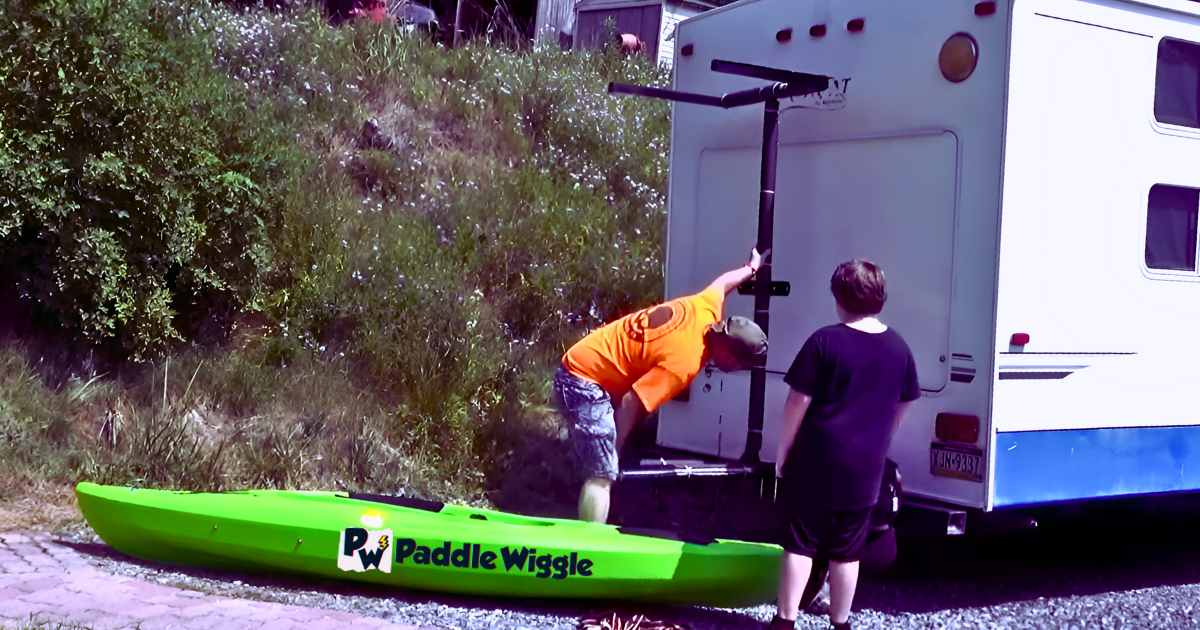
Step 5: Install Mounting Brackets And Attach The Rack To It
To complete the installation of your kayak rack for an RV, it’s time to install the mounting brackets and securely attach the rack to them. This step is crucial as it ensures that your rack is properly supported and can withstand the weight of both the rack itself and your kayaks.
Determine The Ideal Mounting Points On Your RV
Firstly, you need to determine the ideal mounting points on your RV. These points should be strong enough to hold the weight of the rack and kayaks without causing any damage or compromising safety. Once you’ve identified these spots, follow the manufacturer’s instructions for installing the specific brackets you have chosen.
Make sure that you have all the necessary tools and equipment ready before starting this process. Depending on your RV’s structure and design, you may need different types of brackets, such as roof mounts, ladder mounts, or hitch mounts. Ensure that these brackets are compatible with your RV model.
Attach The Brackets
Once you have positioned the brackets correctly according to their respective instructions, secure them tightly to your RV using screws, bolts, or other appropriate fasteners provided by the manufacturer. Double-check that they are firmly attached and capable of supporting both the weight of your kayak rack and kayaks.
Add The Rack
Now it’s time to place your kayak rack onto these mounting brackets. Align it properly so that it sits evenly across all brackets without any wobbling or imbalance. Take note of any adjustments needed to ensure a level position.
Secure Everything
To ensure your rack stays on, use screws, bolts, or whatever the instructions recommend. Just be careful not to tighten them too much – you don’t want to damage your RV or the rack.
Check Twice
As a final step in this process, check once again if everything is level and firmly attached. Give each connection point a gentle shake to verify its stability before hitting the road with confidence.
Remember, attaching your rack correctly is super important for safety. If you skip this step or don’t do it right, bad things can happen. Accidents, broken stuff, you name it.
Now that your kayak rack is safely attached, you’re almost ready for amazing adventures with your kayaks. With a solid rack, you can hit the road knowing your kayaks are secure and ready for action when you arrive.
Step 6: Test And Adjust
Now that you’ve completed building your DIY kayak rack for your RV, it’s time to put it to the test. This step is crucial to ensure the stability and security of your kayaks while on the road. By following these instructions, you’ll be able to identify any issues and make necessary adjustments.
Carefully Test The Stability Of The Kayak Rack
Load your kayaks onto the rack, making sure they are properly positioned. Secure them using bungee cords, straps, or any other reliable method you prefer. The goal here is to mimic real-life conditions and see how well the rack holds up during transportation.
Check For Any Wobbling Or Shifting
Once your kayaks are securely fastened, closely examine how stable they are on the rack. Gently shake the kayaks from different angles to see if there’s any noticeable wobbling or shifting. If you notice any movement, it’s essential to address it promptly.
Make Necessary Adjustments To Improve Stability And Security
If you encounter any instability issues during testing, don’t worry! You can adjust your DIY kayak rack in several ways for optimal performance. Here are some options:
- Reinforce connections: Double-check all bolts and screws that hold the rack together. Tighten them as needed to eliminate any looseness that may contribute to instability.
- Add additional support: Consider adding extra braces or supports in areas where you notice excessive movement.
- Modify padding: If there’s contact between metal parts of the rack and your kayaks, add foam padding or pool noodles as a protective barrier.
- Optimize weight distribution: Ensure that weight is evenly distributed across the entire length of the kayak rack. Imbalanced weight can lead to instability during travel.
- Experiment with tie-down methods: Try different types of straps or bungee cords to secure your kayaks more effectively. Sometimes, a simple adjustment in the fastening method can make a significant difference.
Remember, the goal is to achieve a sturdy and secure kayak rack that can withstand various road conditions. During the testing phase, take your time to ensure you’ve addressed any potential issues before hitting the road.
Step 7: The Final Details
Giving your DIY kayak rack the perfect finishing touches is super important. This step isn’t just about making things look good – it’s about keeping your kayaks safe and making sure your rack lasts a long time. Here’s what you can do:
Soft Padding Or Blocks
To keep your kayaks safe from scratches while you’re on the move, think about adding some soft stuff to your rack. You can use foam padding or blocks. You know those foam noodles people use in swimming pools?
You can cut those up and attach them to your rack. They’ll create a soft layer between the metal and your kayaks, so no scratches happen. Another idea is to use foam blocks that are specially made for kayaks. They fit around the bottom of your kayaks and help keep them snug and secure.
A Little Paint Or Seal
While this isn’t a must-do, it’s something to think about. If you want your rack to look nice and be extra protected, you can paint it or put on a sealant. If you go for paint, pick one that’s meant for outdoor stuff – so it doesn’t rust. You can choose colors that match your RV or something fun that shows off your style.
If you decide to seal it, this helps keep the wood strong by stopping moisture from getting in and causing problems. Just follow the instructions on the sealant to do it right.
Adding these last touches – soft padding or blocks and maybe a bit of paint or seal – you’re making your rack work better and look good. These simple steps make sure your kayaks are safe, and your rack stays in good shape.
So, you’ve gone through all the steps – from planning and getting your stuff ready to putting it all together and finishing up. Now, you’re all set for the trip!
5 Tips For Getting The Most Out Of Your DIY RV Kayak Rack
Building your own DIY RV kayak rack is a rewarding project that can greatly enhance your outdoor adventures. To ensure you maximize the benefits of your homemade rack, here are five essential tips to keep in mind:
Choose Strong Stuff
When you’re making your DIY kayak rack, go for tough materials that can handle the ups and downs of the road and different weather. Get brackets that won’t bend easily, screws that don’t get rusty, and strong crossbars. Good materials mean your rack stays strong, and your kayaks stay safe. Plus, you won’t always have to fix or replace things.
Measure Twice, Build Once
Building a kayak rack that fits just right is super important. Measure your RV properly, think about where the rack will go, and measure your kayaks too. A rack that fits perfectly means your kayaks won’t move around too much while you’re driving, and they won’t get banged up.
Take Wind Resistance Into Account
Having kayaks on your RV’s roof makes it harder to drive because of the wind. You might use more fuel, especially on the highway. Drive slower and use cruise control to save on gas.
Spread The Weight
It’s like packing a suitcase – you want the weight to be balanced. When putting kayaks on your rack, ensure they’re spread out evenly. This keeps your RV steady and safe while you drive. If the weight is lopsided, your RV might not handle it well.
Don’t Overload
Know how much your rack can handle. If you put less weight on it, it might break or not work properly. This could be super dangerous while you’re on the road.
Shield From Weather
Think about protecting your kayaks from the weather. Get covers or sleeves that can stop rain, dust, and junk from getting on them while you’re driving. This keeps your kayaks looking good and safe.
Check Local Regulations
Different places might have rules about how big your kayak rack can be. Check the rules for where you’re going so you don’t get into trouble. Following the rules makes your travels smooth and worry-free.
Learn More
Can I Install A Kayak Rack On An RV?
Most RVs can accommodate a kayak rack; however, it is essential to consider factors such as roof weight capacity and compatibility with existing attachments.
Consult your RV manufacturer’s guidelines or seek professional advice if you have any doubts about installing a kayak rack on your specific RV model.
How Do I Determine The Right Size For My RV Kayak Rack?
To determine the appropriate size for your kayak rack, measure both the length and width of your kayaks while accounting for additional space needed for secure tie-downs. Consider factors such as the number of kayaks you plan to transport and the available space in your RV.
Do I Need Any Special Tools For Building A Kayak Rack?
Basic tools such as a tape measure, drill, screwdriver, and wrenches are typically sufficient for building a DIY kayak rack. However, depending on the design and materials used, you may require additional tools, such as a saw or angle grinder.
How Can I Ensure My Kayaks Are Securely Fastened To The Rack?
To ensure your kayaks are securely fastened to the rack, use high-quality straps or bungee cords specifically designed for securing loads during transportation. Make sure to tighten them properly and check for any signs of loosening throughout your journey.
Final Words
In simple words, making a kayak rack for your RV is a cool project that mixes practicality, creativity, and safety. Follow the steps in this guide, like picking the right design and stuff, fixing it well, and thinking about things like wind and weight. This DIY thing doesn’t just build the rack – it lets you take control of how you travel.